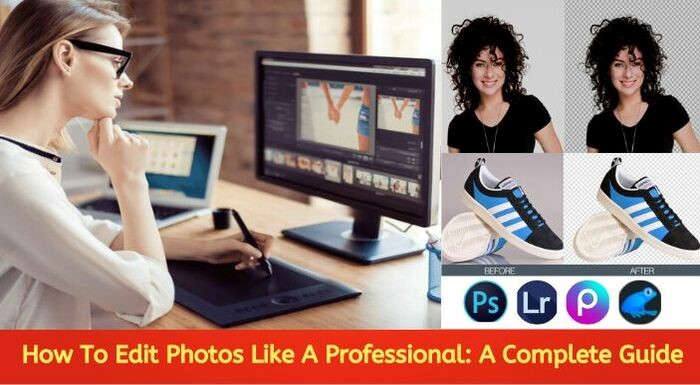
Introduction
We need to edit photos to remove all the inconsistencies from the pictures and give them an eye-catching look. However, photo editing is not an easy task and requires years of experience to edit a photo professionally. Also, hiring professional editors is a bit costly and time-consuming. However, you can also create mind-boggling photos by following some easy methods. And, this is what I am going to discuss in this article.
Here you are going to learn about the basic methods of editing professional photos. You will also get an insight into the processes to handle the photo tools to create and get your desired photos. So, without further ado, let’s start our journey.

What is professional photo editing?
Experts in the area of photo editing (sometimes known as “retouching”) spend much of their days making alterations to client photographs to boost their quality, tailor them to a particular use, or inject some creativity into them. They utilize image-editing software for a wide range of purposes, from improving the quality of a holiday picture taken by an amateur to making visual effects for a Hollywood blockbuster. Sometimes it can be used for creating aesthetic wallpapers too. Professional photo editing is necessary for creating outstanding wallpaper.
Creative thinking, meticulous attention to detail, a firm grasp of color theory, and a working knowledge of technical photography are the mainstays of professional picture editing.
Choose your photo editing program

Choosing a suitable photo editing program is very important to edit photos professionally. Selecting the photo editing software depends on the type of photograph and the type of editing you need. You can use different image editing programs such as Afterlight, Snapseed, or VSCO for basic photo riding.
But if you’re serious about becoming a professional photographer, you should look into adopting some standard industry software for picture editing. It’s safe to say that Adobe Lightroom and Photoshop are the most widely utilized programs out there. Professional photographers rely heavily on the program due to its extensive set of editing tools. In this article, I am going to talk about Photoshop’s photo editing methods. So, open photoshop on your computer and start practicing the following methods of professional editing.
5 Photoshop Techniques To Edit Photos like a pro
In this tutorial, I’m going to discuss the five important photoshop editing methods. Professional photo editors use these techniques to create eye-catching photos. Let’s start.
Crop And Straighten The Image
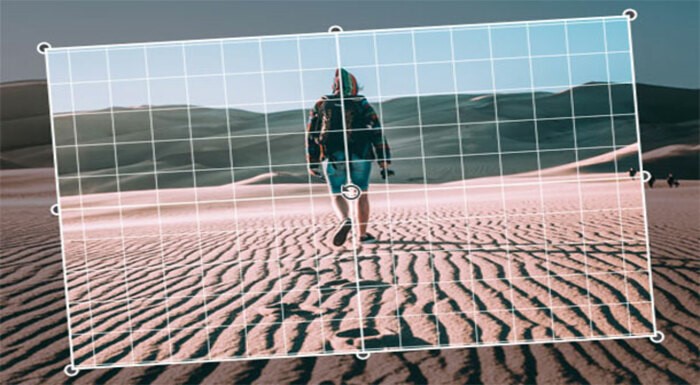
Cropping a picture focuses on a certain region. Image straightening removes lens distortion. Photoshop’s crop tool makes picture cropping easy (c). Click and drag around your topic, then click one of the corners to decide what to retain. Hit enter to save.
This method also straightens photos. If you don’t have a tripod, use anything stable to take photos (a wall or large rock work well). Place a bill or business card between the camera body and lens and the thing you’re capturing. This prevents camera shaking.
After capturing a photo, crop any surplus space from the edges. Any movement during the shot will show as diagonal lines. Cropping and straightening may also have a significant impact. Cropping involves removing elements of a picture to make it more aesthetically attractive or have a more balanced composition.
Straightening means correcting a slanted picture. Image effects go beyond cropping and straightening. The “Adjustments” tab has these effects. Color correction, tone, and special effects like adding grain for a film appearance or a pencil sketch effect are examples.
Also, most of these modifications are non-destructive, meaning they simply change the image’s appearance.
Correct Exposure
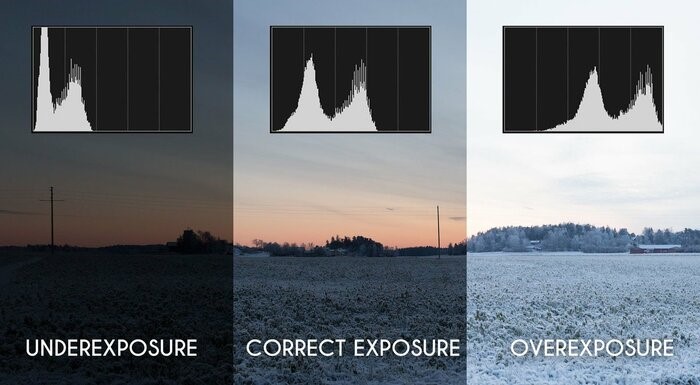
Proper exposure is essential for photography. Depending on the context, composition, framing, etc., photographs might seem superior. Even if you have a great photo, exposure is the most important factor. There may be some difficulty with exposure. Incorrect exposures might result from being unfamiliar with your camera.
Even if you have extensive expertise with cameras, mistakes are easy to make. Even the most skilled photographers often have trouble getting all of their camera settings quite perfect in any particular scenario or lighting condition. The correct exposure for both digital and analog cameras is detailed here. I’m going to write a separate essay where I talk about shooting at night and using natural light.
The most typical problem with photographs is that they are either underexposed or overexposed. Low-quality, underexposed photos are those that don’t capture enough of the ambient light. Taking high-quality photographs is easy even without an expensive camera. You can get a high-quality digital camera for about $500 and take it with you wherever.
These cameras could use a memory card to take pictures. A knowledge of aperture and shutter speed is necessary for correct exposure. You also need to understand how these two features reflect light in your photographs.
Remove Unwanted Background
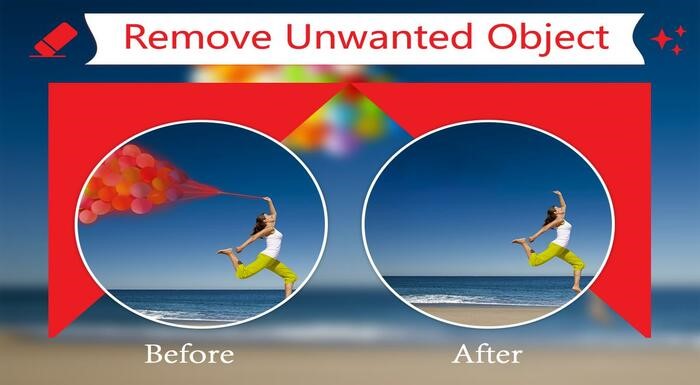
Photoshop is the best choice to remove unwanted objects from the image. Professional editors also provide Photoshop Background Removal services to get rid of unwanted backgrounds. Thus, you can highlight your subject in the image, which helps to bind the customer attraction in the image.
A photo editing company applies two methods to remove the unwanted background from the photo. One is the clipping path and the other one is the image masking service. Let’s see which one is the best suited for your photos.
Clipping path
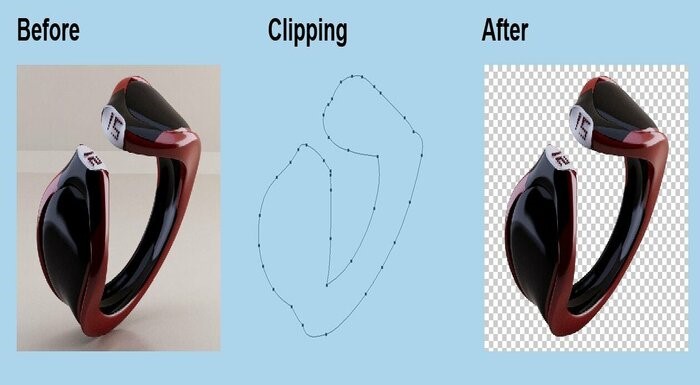
Photoshop Clipping Path is an intensive technique for modifying images. It’s the heart and spirit of what editors do. Using Photoshop’s pen tool, the editors isolate a certain area of the picture by drawing a path around it. They assume command of that region, allowing them to make targeted changes without influencing the whole picture.
As a result, it is now easier to correct imperfections in a localized area of a picture. This is the first stage in making impressive effects. Companies, publications, and amateur photographers alike that care about presentation quality should always use the clipping path method. An additional service offered by experts in the field is clipping. Pick the one that best compliments your persona.
Image masking
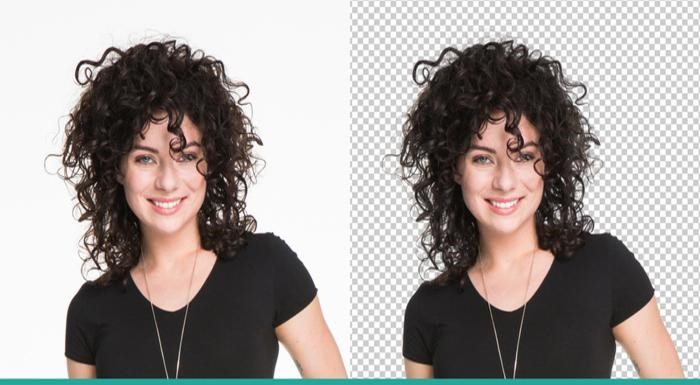
Similar to the clipping path, the image masking service allows for selective image adjustments. However, picture masking works best with complicated images that have numerous transparent elements. Image masking is also required to remove the image’s backdrop if it contains hair or fur.
Masking images is also crucial for complex photo editing. You may now make images that appear genuine to the people who are interested in seeing them.
Rectify the White Balance Of The Photo
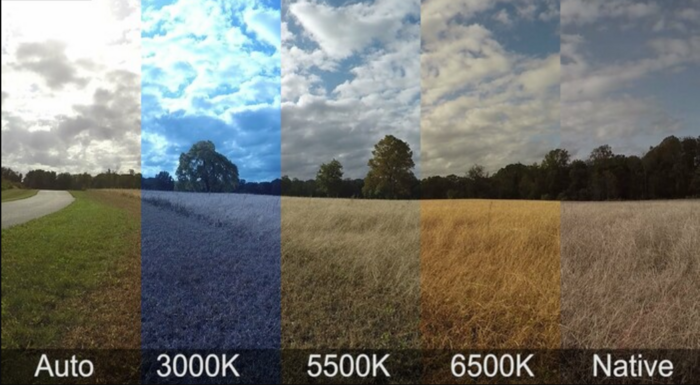
The color temperature of the light in your photograph is referred to as its “white balance.” In most cameras, this is done automatically; nonetheless, there are times when this setting is incorrect. If the shot seems too blue, try adjusting the white balance.
How-to:
- Get Photoshop going. GIMP is a free, open-source alternative to Photoshop (see Resources).
- Color, Mode, and RGB Images
- Mode, Grayscale, and Image.
- Hue/Saturation may be added by selecting Layer > New Adjustment Layer.
- To remove all color from the image, go to the Hue/Saturation menu and drag the Saturation slider to the left.
- Click OK twice to exit Hue/Saturation.
- You may convert a color photo to black and white by doing this:
- Use the menu options to choose Layer > New Adjustment Layer > Levels.
Take advantage of automatic modes
The algorithms used in modern picture editing software have come a long way in terms of automatically enhancing photos. These enable the software to evaluate a picture and provide editing recommendations. Furthermore, the outcomes may come as a shock to you. A wand-shaped icon often denotes the automatic setting.
The auto feature in digital picture editing software is seldom used by serious photographers. However, some people confess to relying on photo editing software like Photoshop. Photoshop is a non-destructive editing application, so if you don’t like the results, you can always reverse the modifications. This means that the original picture is never permanently altered.
Conclusion
Photo editing is a time-consuming task and requires a lot of expertise in this field. And, it becomes quite a challenging task in editing photos in a bulk number. In this regard, you can hire an expert photo editor for your company. You can find top-quality image editing services at a very cheap piercing by searching online by the keywords“ Photoshop Near Me”. However, you have to be cautious while selecting an image editing agency for your company, as there are a lot of newbies out there.
FAQ
What is a clipping path service?
A clipping path service provider creates a vector path to cut or remove any portion of the image. Also, the clipping path uses for many purposes such as color correction and shadow adding.
How much does background removal cost?
The kind of photographs will determine how much the background removal services will cost. Simple background removal services are the least expensive, while more complex background removal services are more expensive. Each picture costs $0.29 to start.
Recent Comments